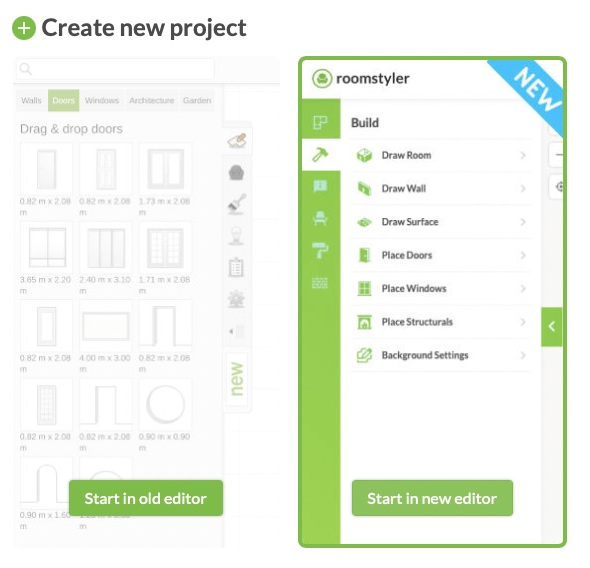
For some time we have a new version of the editor and over the past year we have further fine-tuned this new editor to do all the things the old Roomstyler editor is doing and much more.
So what are the main differences between the old and the new Roomstyler editor?
Some things are in a different place or work just a bit different. On this page we’ll guide you through the biggest differences.
Creating a room
Ready made room shapes in the new editor are available in the intro wizard.
In the old editor you can draw wall by wall, just as in the new editor. The buttons are located differently.
In the new editor you can draw a room with 2 clicks. It’s easier to split walls and reconnect walls, and there are more options for adjusting the wall height and wall thickness. Walls and rooms can be given a slope by adjusting the height of wall corners.


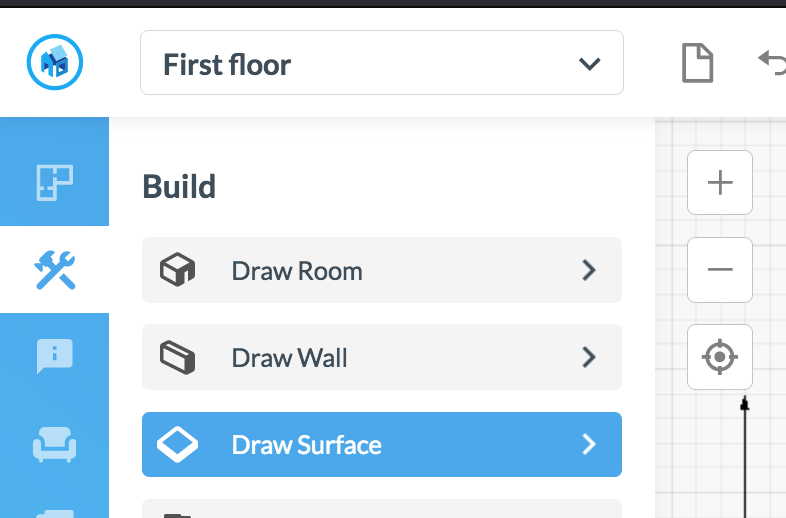
Gardens, higher floors, lower ceilings, roofs, etc.
Do you need a higher floor, a floor on a different level or a lower ceiling?
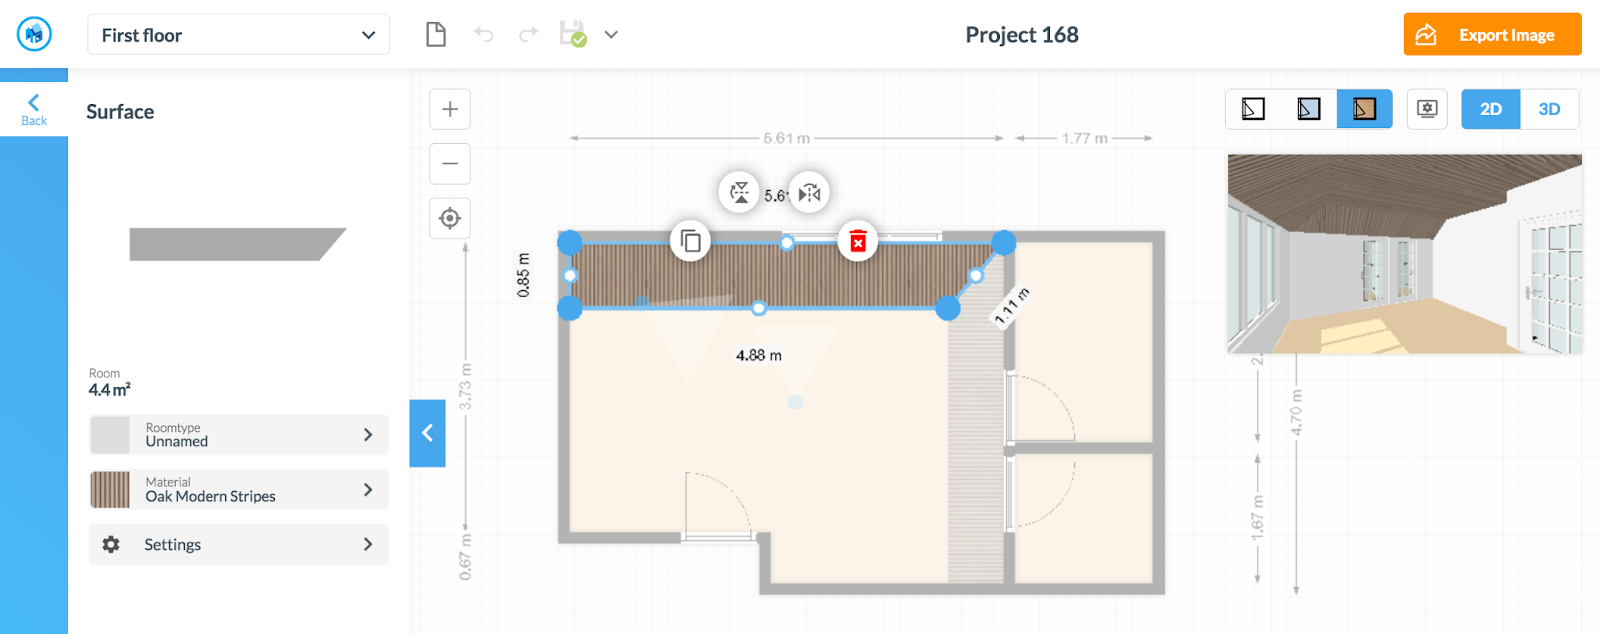
Instead of searching the library for the right objects, just draw a surface in your desired shape, height and give it any material you want.
Also a very useful tool for creating surfaces without walls, for landscaping and garden design.
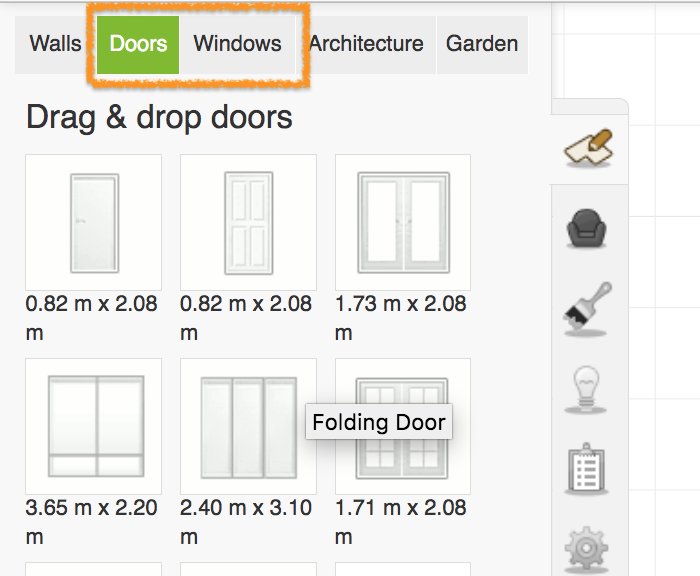
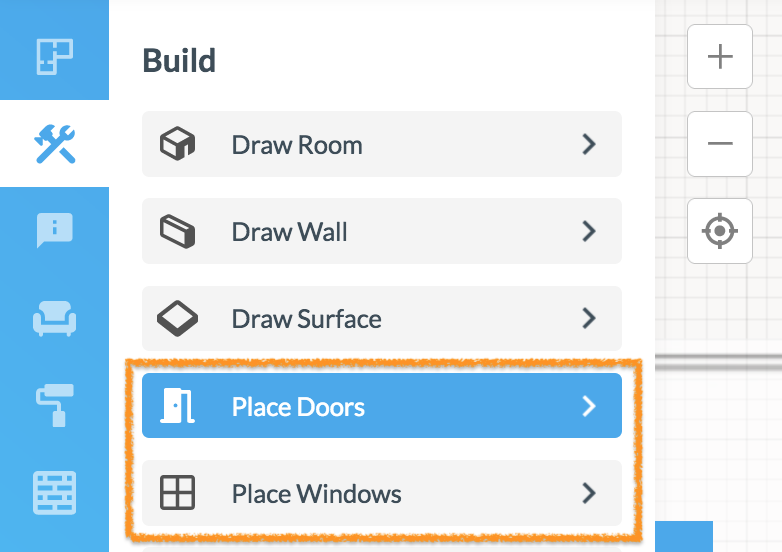
Doors and windows
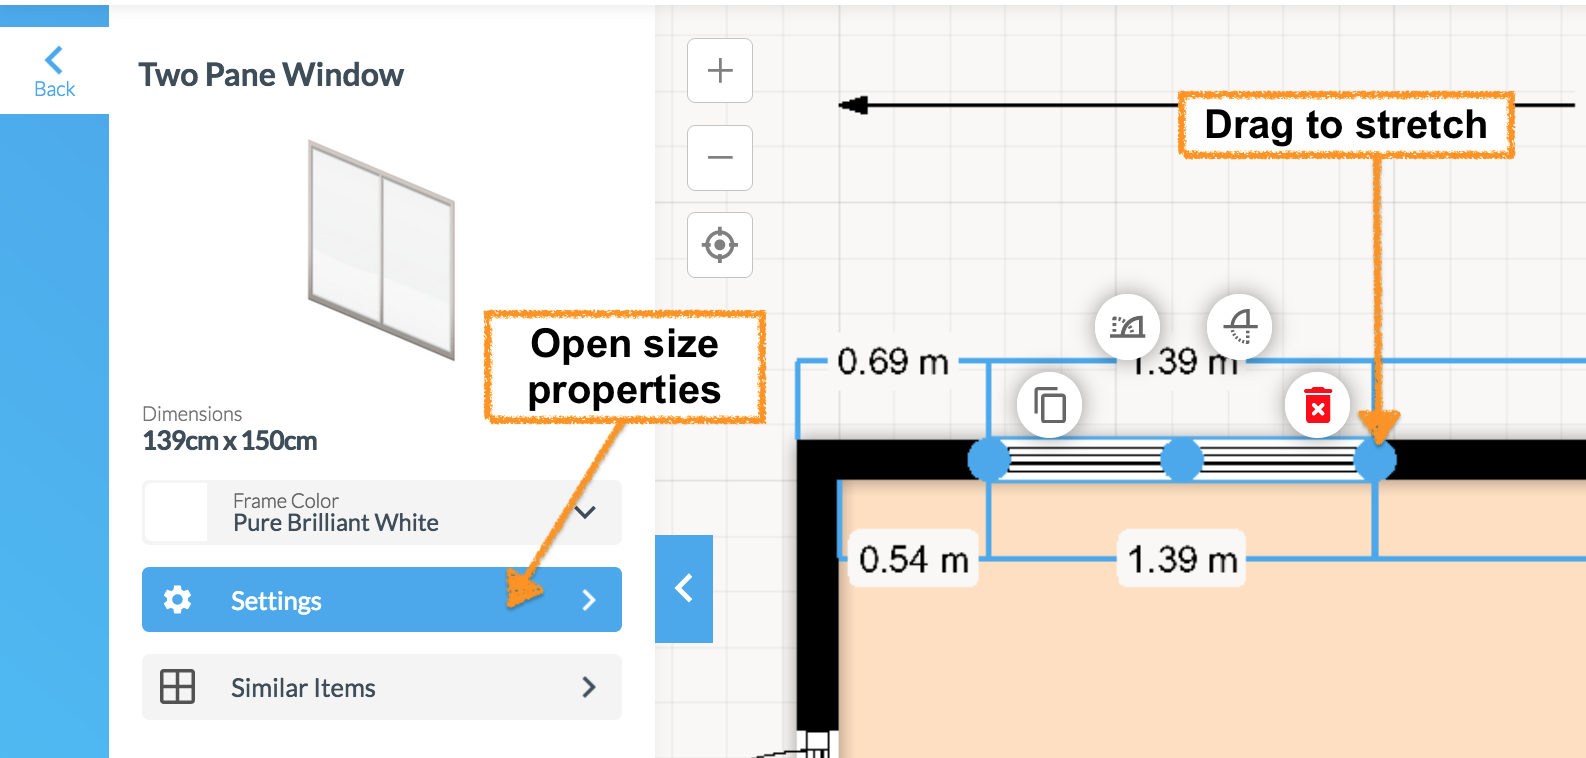
These can be found here. There are more variants and these are also easier to resize.
Tip: For rounded windows you create a round hole in the wall, and the Architecture section in our library has several round window options.
To edit the properties of a door or window, either doubleclick the items or select the settings
Camera view
In the old editor the room preview is on by default. In the new editor they look a bit different, but there is more variety in the camera angle..
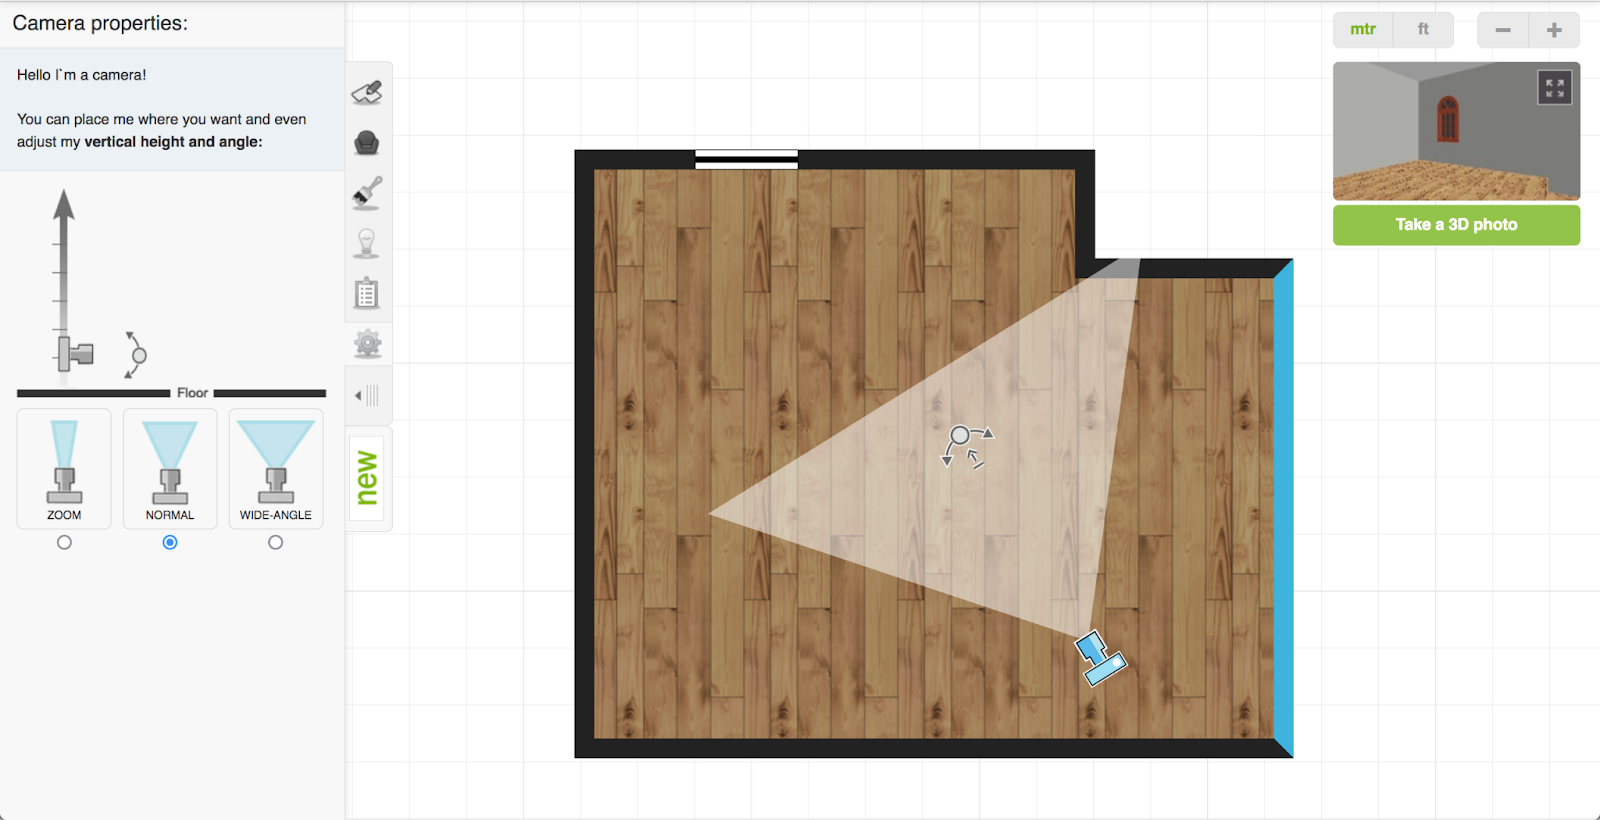
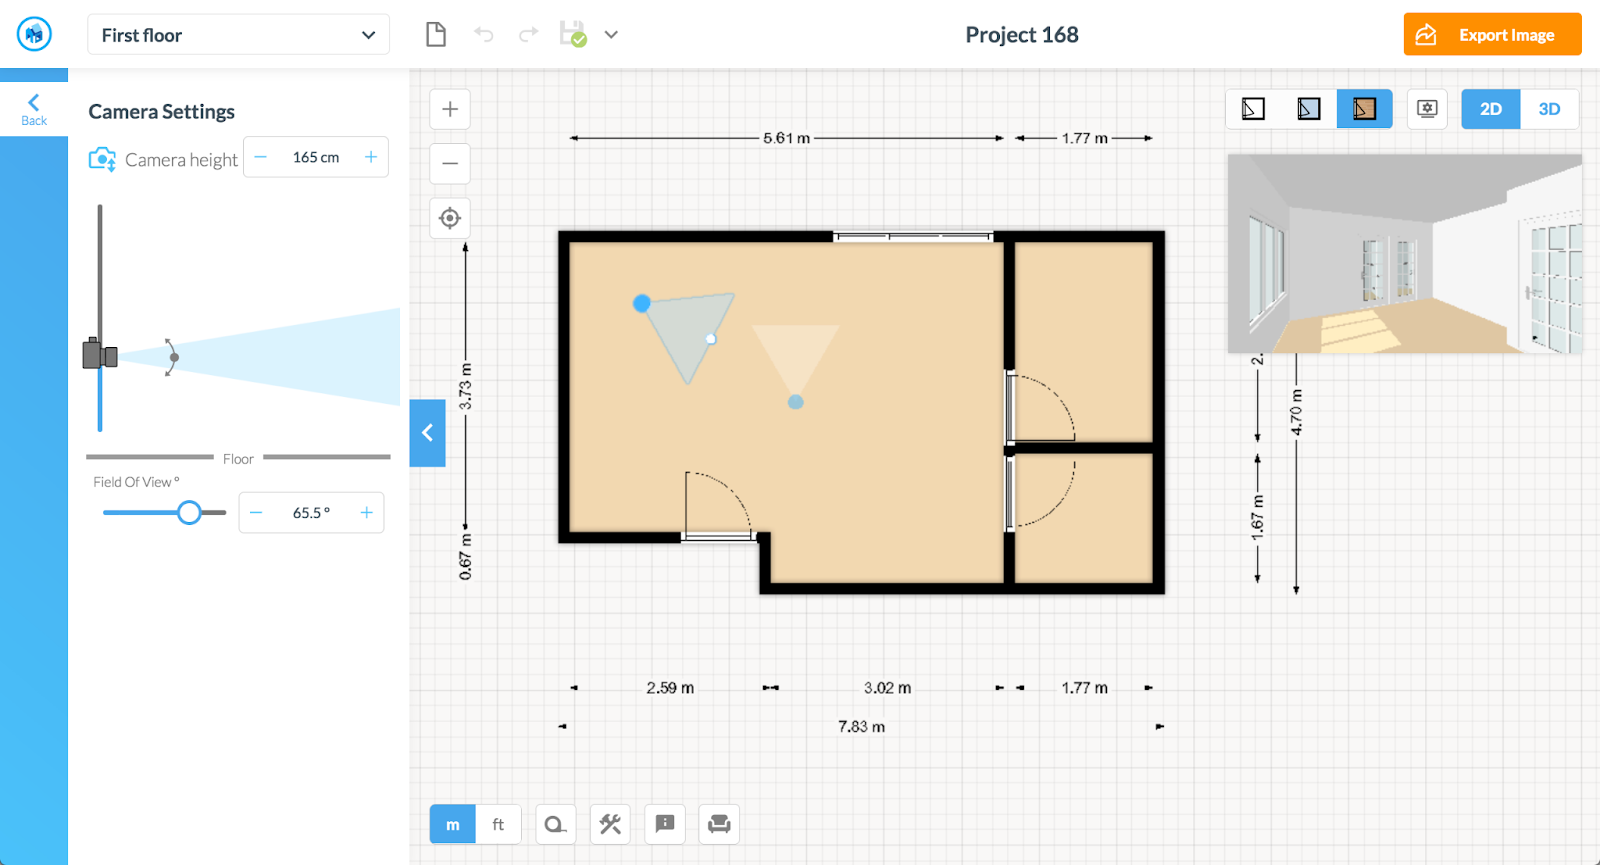
You can even go to the 3D view to add multiple cameras and edit objects in 3D.

From this view you can
-Add a scenery image
-Change your light settings
-Change the sun direction
-Edit furniture in 3D
–Export a 3D photo

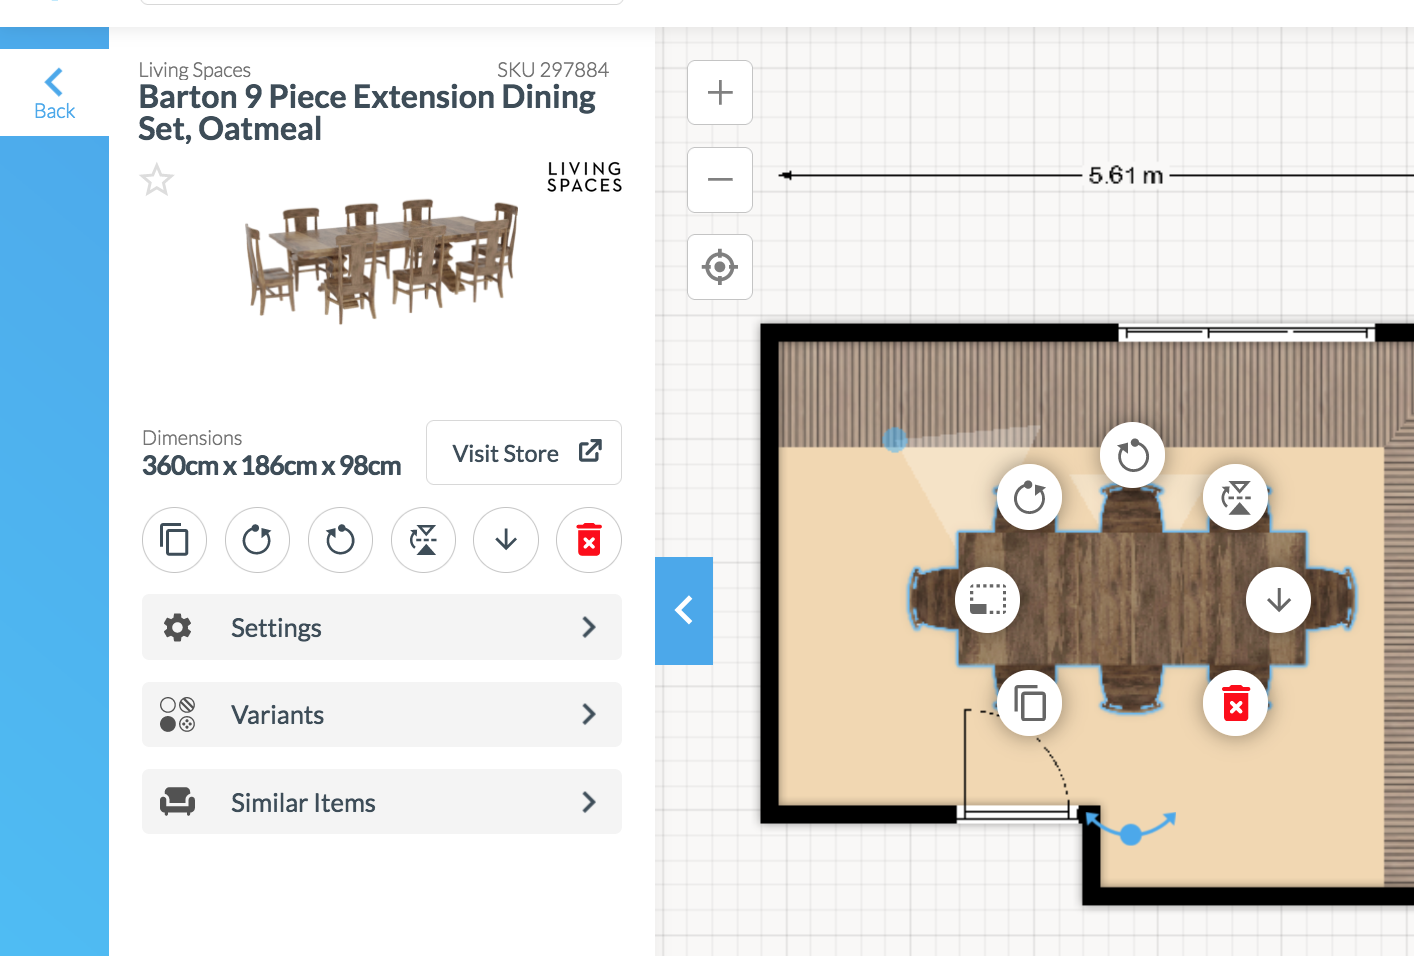
Finding Furniture
The new editor has the same library as the old editor, but with some improved filters and search options.* This is where you can find the various sections. Interesting additions are our option to create a list of favorites and filter on brands. Clicking on an item lets you change it’s color or choose a material variation, and also provides a list of similar products.
*keep in mind that for sponsored contests there can be a limited set of items specific to the sponsor

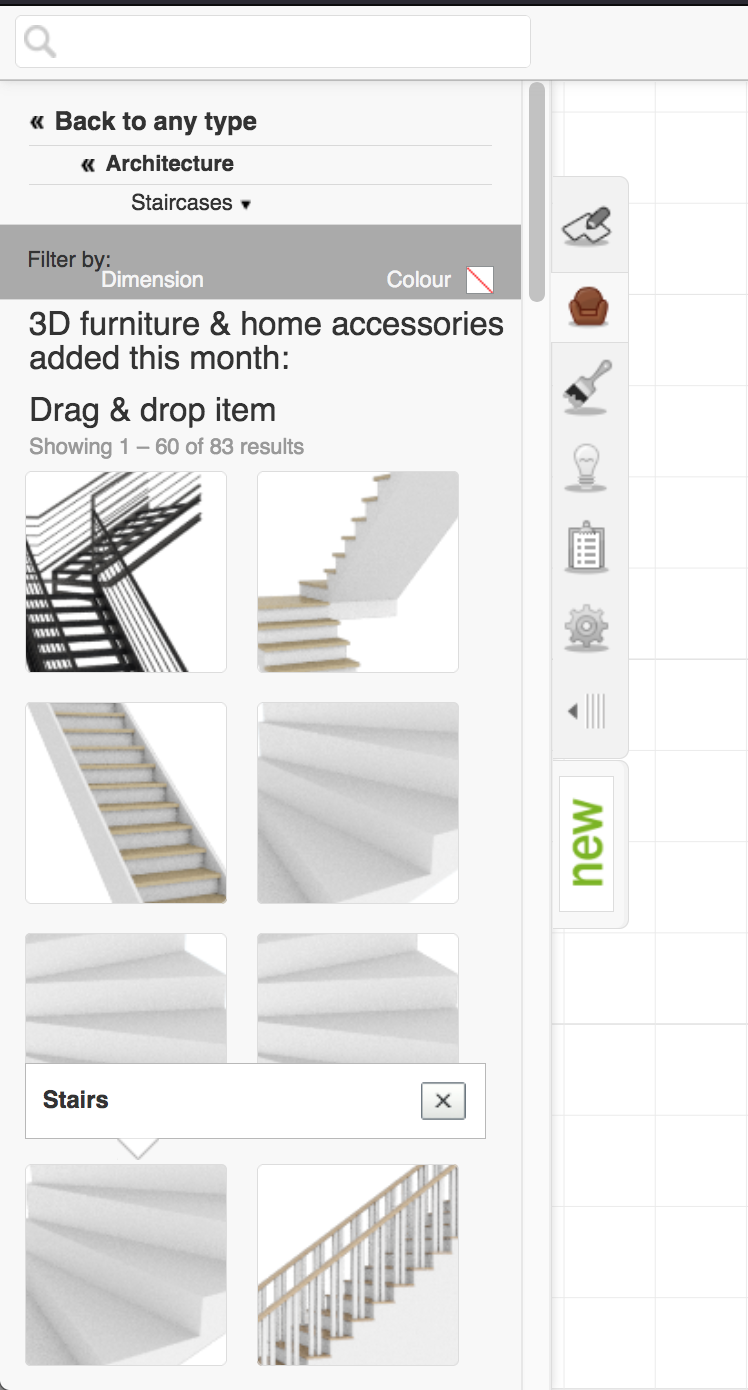
Architectural elements
Staircases, fireplaces, pillars, beams, balconies all can be found in the object library in various subcategories. In contrast to the old editor, in the new editor most objects can be resized.
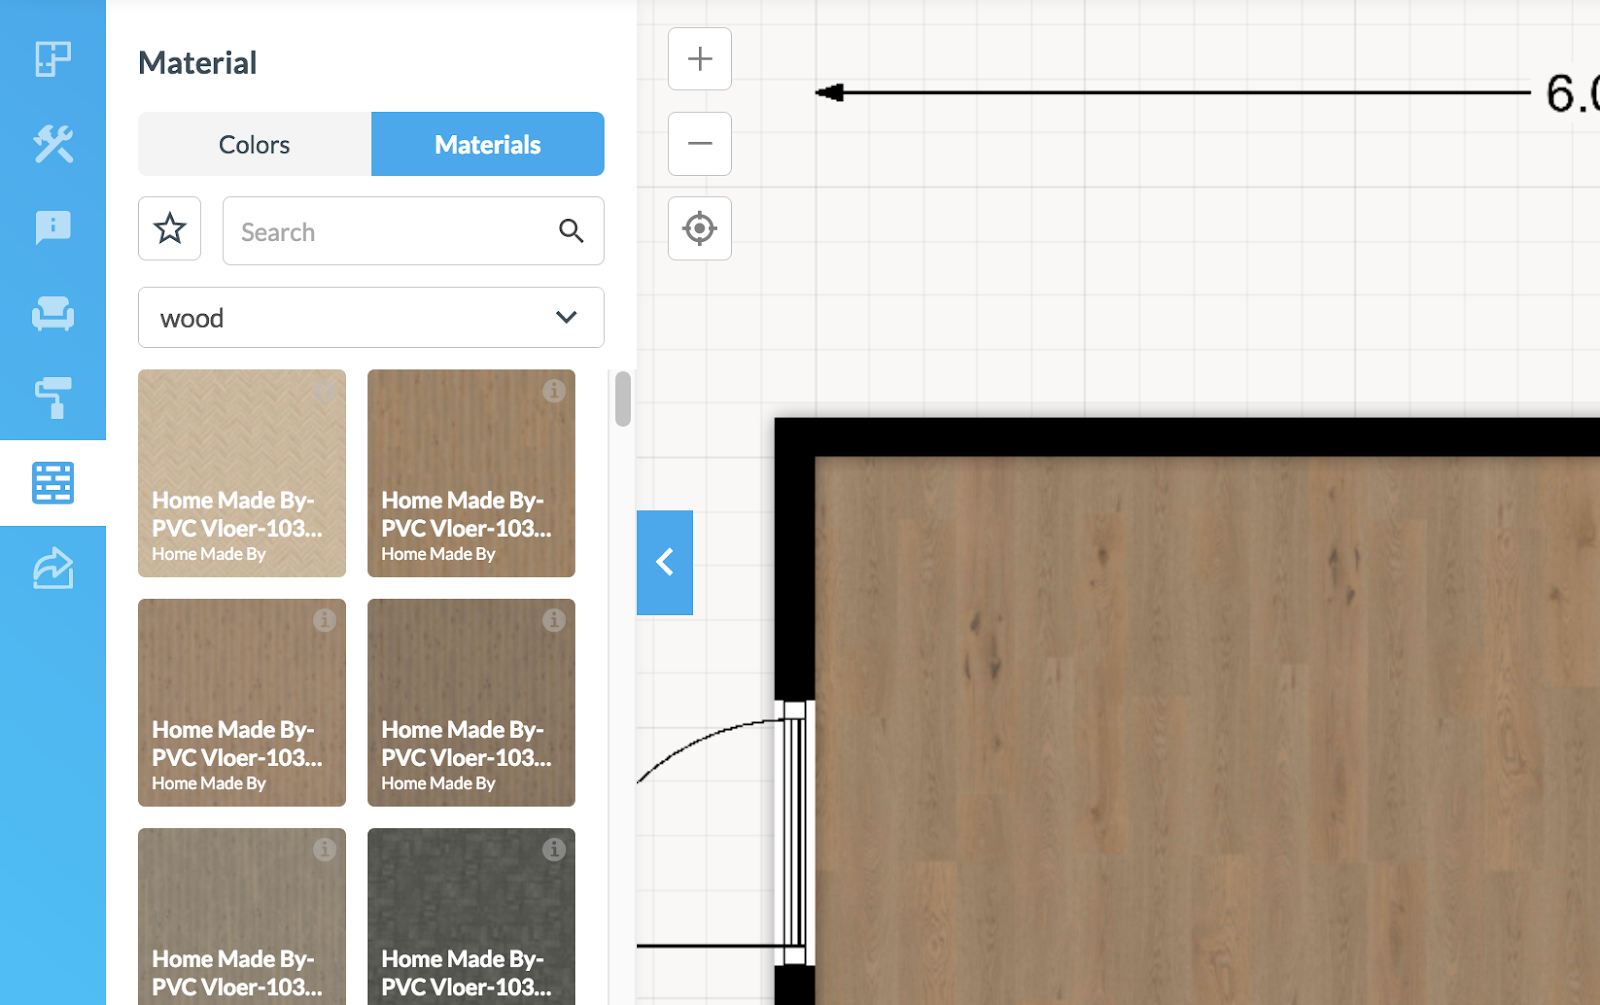
Applying materials to walls and floors
You can apply materials and even custom images to walls in the wall view. Click on a wall, pick a side in the sidebar and apply a color or material. Choose the frontview to upload a custom image to use as wall pattern or artwork.


Materials and colors
Below is the color and materials library. Just drag and drop a material from the sidebar on top of your surface
Creating a 3D photo
In the new editor you can create a 3D photo from a camera using the buttons displayed below.
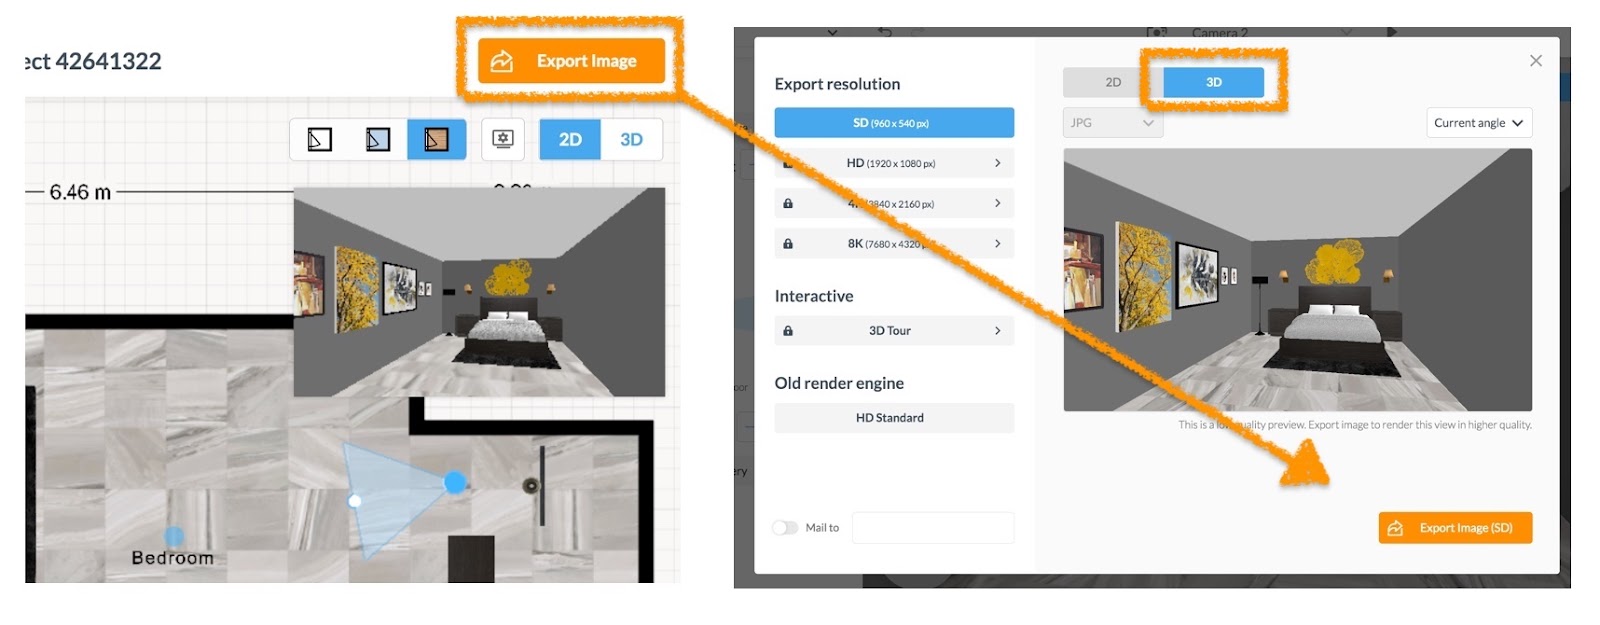
The image will appear in your dashboard. In your dashboard projects tab, search for the sponsored project from which you can submit your export to the contest.